

We literally started them at 7:30 that night. Here is the recipe.
1 cup salt
1 cup water
2 cups flour
There are several variations on the recipe some saying use boiling water, and some saying use warm water. We just used regular temperature water out of the faucet. One thing I did do differently was I made up my dough in two 1/4 batches because I was running low on salt, and I wanted to make sure I had enough. This seemed to work out really well.
Jack poured the water and salt into a bowl, and gave it a good stir. Then he poured in the flour and stirred that as much as he could. Taking the advice from another recipe I sprayed 3 quick sprays of Pam cooking spray into the mixture, and I finished forming the dough into a ball kneading it a few times.
Jack then helped me roll the dough to 1/4 inch thickness onto an ungreased cookie sheet. We did this in small batches too. We then used our Christmas cookie cutters to cut shapes into the dough, and peeled away the extra dough rolling it out onto a new spot on the sheet. This worked out nicely because the ornaments were already on the cookie sheet, and we didn't need to mess with trying to peel them off the counter to put them on the sheet, and chance wrecking them.
You could always flour your counters and roll everything out there.
Take a toothpick or a straw (we used a straw) to poke a hole someplace in the ornament so you can hang it on the tree.
Once we were finished we put them in a 250 degree oven for 90 minutes, or until they are hard. Then we took them out and let them cool for a few minutes on the counter. Then I flipped them over, and stuck them back in the oven to bake for another 60 minutes. I would say just make sure they don't turn brown, and make sure they get dry.
You can always let them air dry, but this might take a few days.
You can always let them air dry, but this might take a few days.
The next day we used acrylic paint, as was advised to paint them, and added some glitter for a sparkly touch. Beware you and your kitchen may be permanently covered in glitter! After they dried I sprayed them with a clear coat to help them last longer, and then we stung our ribbons through them.
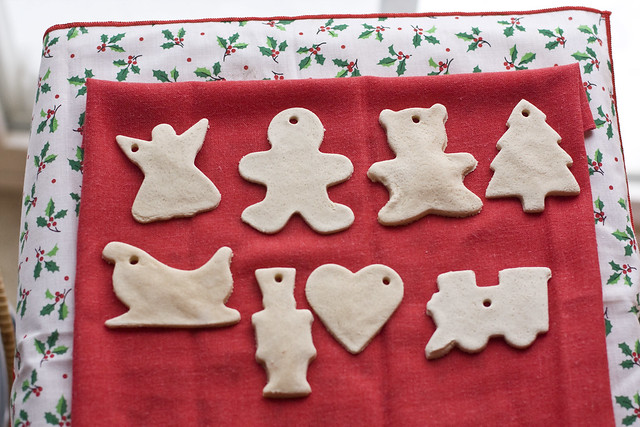
Here they are all naked from the oven
Ahem, excuse our artistic abilities, but I just love them! Zach even got in on the action. He did the snowman, and the candy cane.
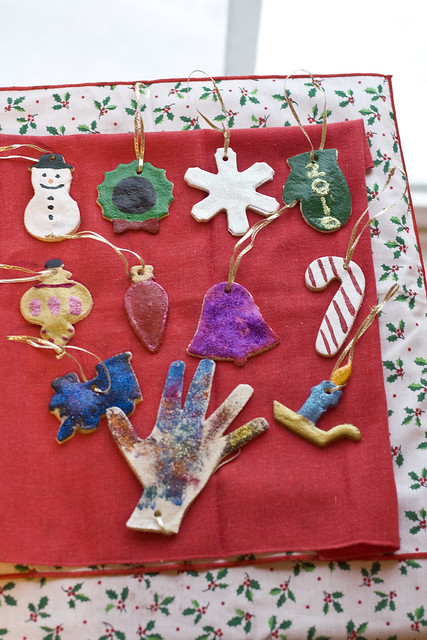
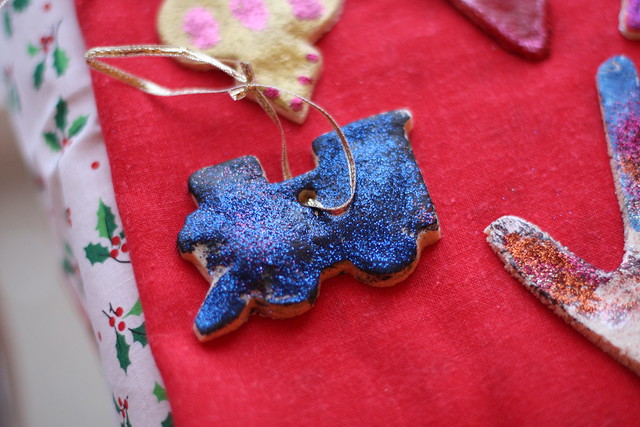
Of course Jack had to do the train
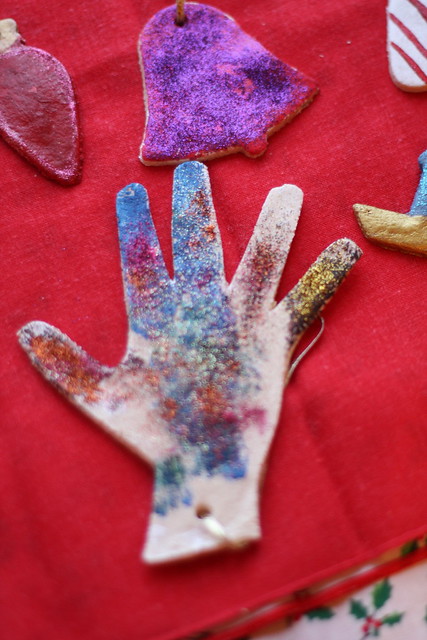
Jack's 4 year old hand. It looks huge!
I think they make a very nice addition to our tree.

The next day I made another batch of dough so that I could do Jack's hand print. I didn't do the dough in small batches, and the it turned out a bit funny. I kept having to add a bit of salt, and a bit of flour. So you might need to tinker with the dough to get it the right consistency. I was also using my sea salt instead of fine salt so that might have made a difference too. You can also add food coloring to your dough if you want.
Jack really had so much fun, and I thought it was a great project. It let Jack do his favorite thing. Bake! It was nice because he got to use the cookie cutters, and we could mold the dough as many times as needed. We didn't have to be as gentle as we would have needed to be if we were making actual sugar cookies.
2 comments:
what a great idea!! Kennedy and I might have to do this on a day we are home with nothing going on. The ornaments turned out really well.
They turned out beautiful. This could be a great Xmas present for Grandma's. "hint hint ;)"
Post a Comment